Hacking Furbo - A Hardware Research Project - Part 1: Acquiring the Hardware
This post kicks off the series by detailing the acquisition and teardown of Furbo devices. The team explores network traffic, firmware retrieval, and UART access
Introduction
In mid-March our research team began looking for a target to assess as part of a long-term project. After some time searching, we set our sights on Furbo. Tomofun, the creators of Furbo, offers two devices which you can set up in your home to monitor your pet's activities throughout the day and, with the higher-end Furbo 360, toss treats their way, send voice messages, and monitor their activities more thoroughly.
We picked the Furbo devices for several reasons: it had previous security research (although that had been done some time ago), it is a popular product, the impact of compromising a device were high, and Tomofun does have a vulnerability disclosure program, which should've made the disclosure and remediation process very smooth.
Previous Research
In a three part blog series, SomersetRecon detailed their research on the Furbo product line (the first of which can be found here https://www.somersetrecon.com/blog/2021/hacking-the-furbo-part-1). In this, they identified several high severity vulnerabilities including the ability to perform TLS downgrade attacks resulting in remote code execution, through modifying the firmware which was downloaded via the update process—a pretty interesting attack chain.
While we waited the short 24-48 hours for an Amazon delivery these blog posts helped us understand what we may be up against when we receive our product. Our hopes were high! Unencrypted firmware, RTSP for P2P communications, and RCEs! Unfortunately for us, it turns out that the Tomofun security team has spent much time since 2021 on security improvements.
Our first device
As previously mentioned, there are two devices on offer: the Furbo 360 and Furbo Mini. While the Furbo 360 was slightly more expensive, it offers a wider range of features and as such was the first device we purchased for the purposes of our security research.
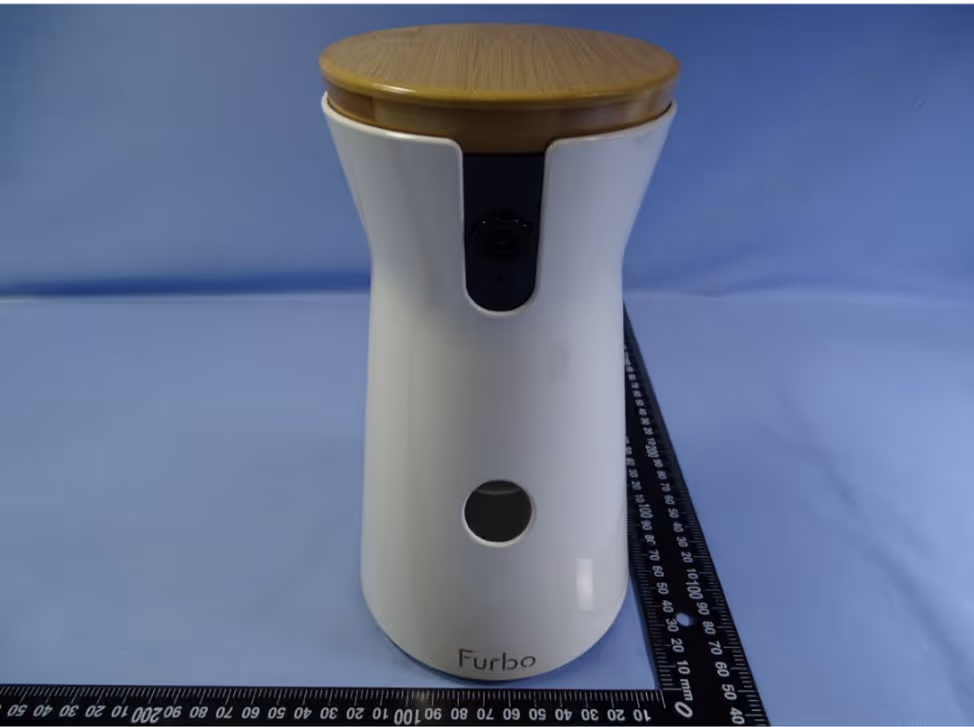
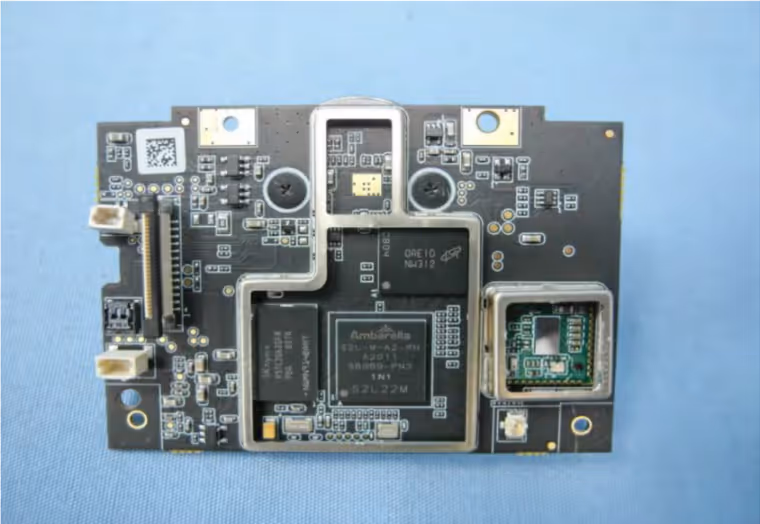
Having found Furbo's FCC filings on fccid.io, we were able to get pictures of the internal components and compare how they differed from those which we saw in SomersetRecon's blog series.
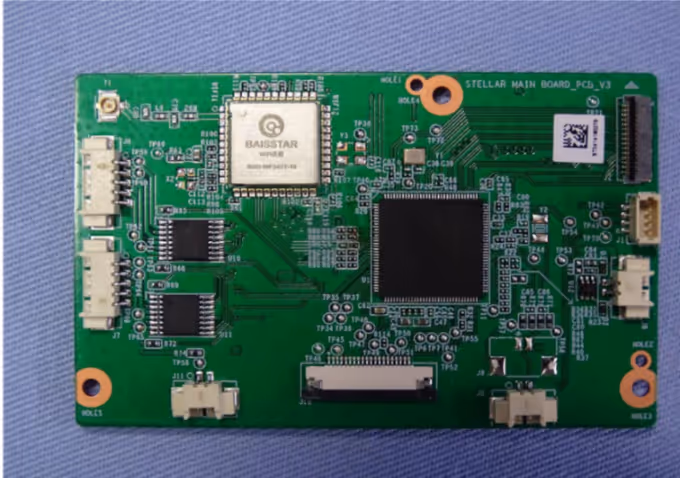
The difference between the two devices, the Furbo 2.5 tested by SomersetRecon and the Furbo 3.5 which we would be testing (or 360 as it is known in marketing materials) was astounding. Below is the main board of the previous Furbo device.
Upon receipt of the device, we got to work. Our first task: monitor the traffic and identify any open ports so as to start mapping the device's attack surface.
Traffic Analysis
Before turning on and configuring the device we set up Matt Brown's mitmrouter with a Wi-Fi access point and configured it to send all HTTPS traffic to certmitm, where it may be downgraded and decrypted.
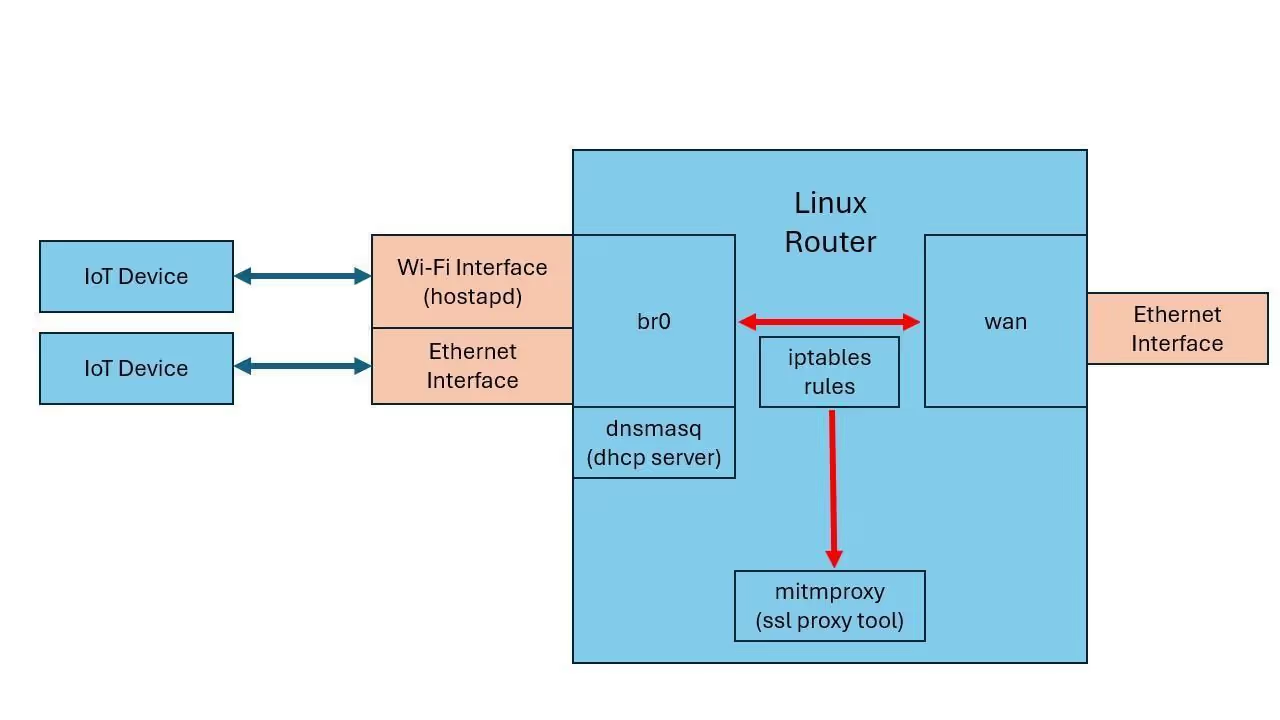
This setup also allowed us to easily monitor all network traffic from the Furbo device, as it would have to pass through our own host before reaching the internet, enabling us to run a Wireshark capture. Seen below is an excerpt from our first Wireshark capture.
We quickly determined that these UDP requests were the peer-to-peer (P2P) communications between the Furbo device and their servers.
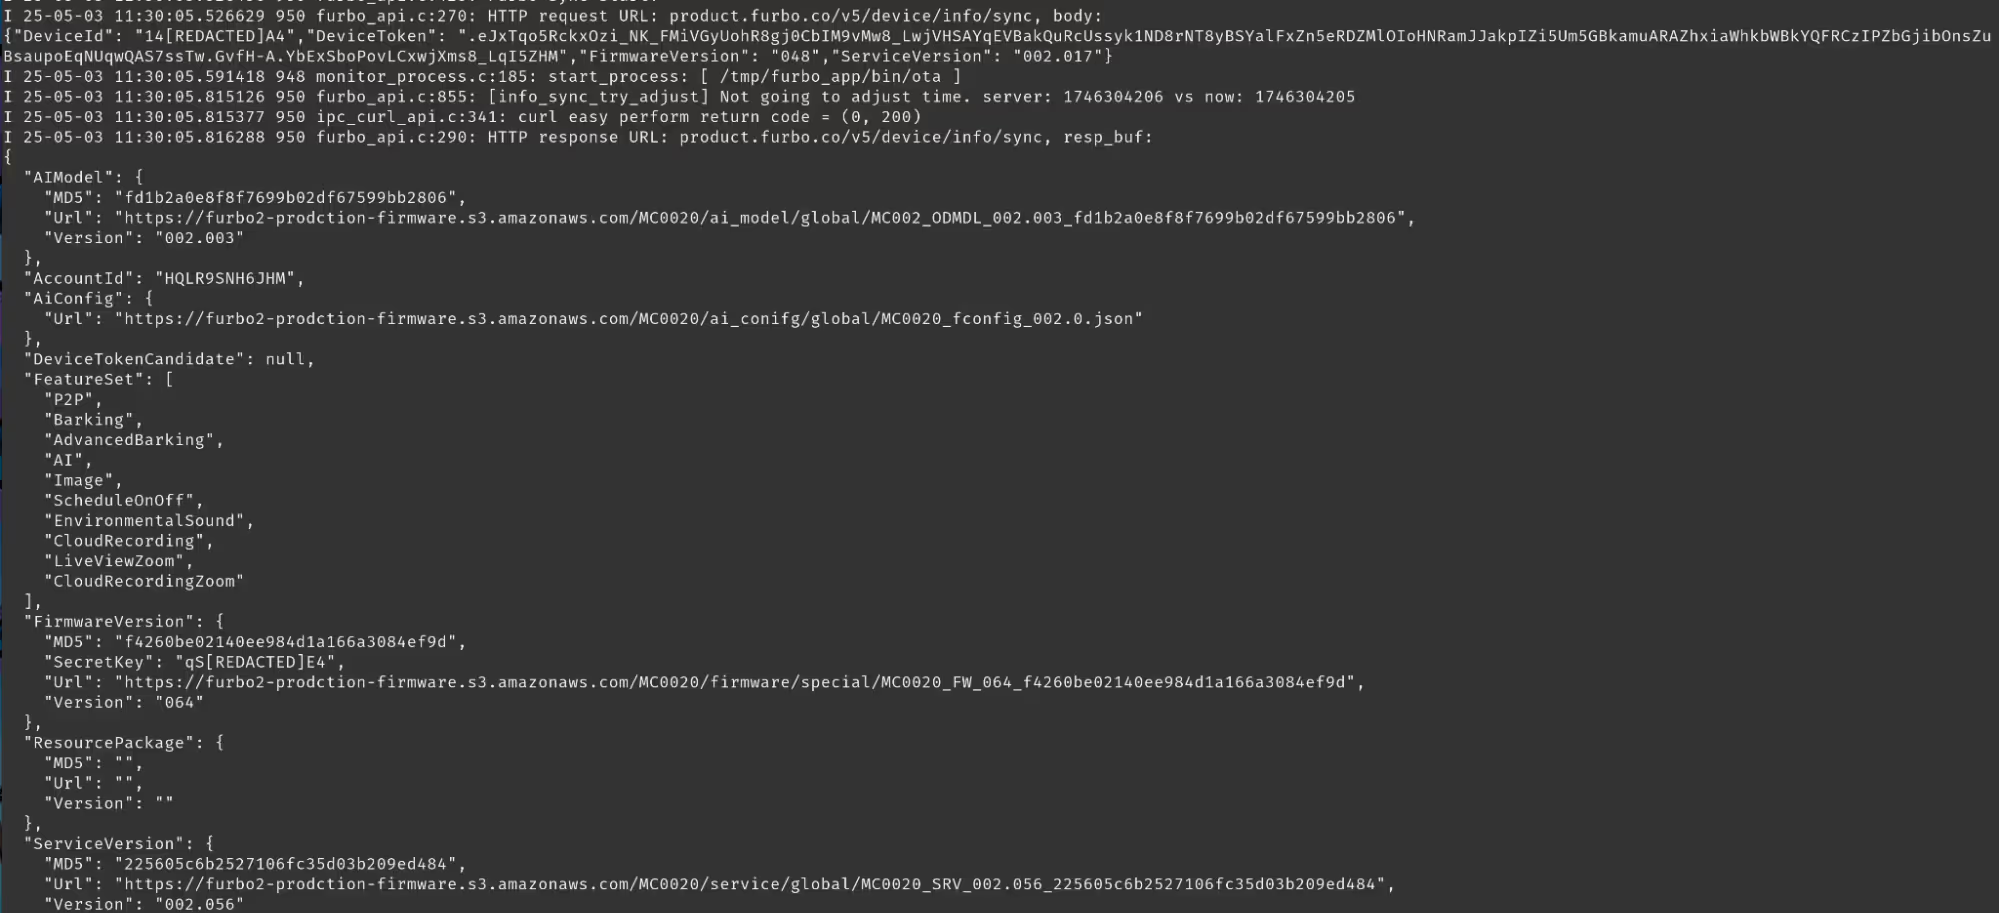
Our first win came soon after the device booted up. Certmitm successfully downgraded the TLS traffic and decrypt its contents on one endpoint which the device talked to: firehose.us-east-1.amazonaws.com
Firehose is a service offered by Amazon to provide “real-time streaming data to popular destinations like Amazon S3, Amazon Redshift, Splunk and more and simplify the process of ingesting and transforming data…”

After Base64 decoding the POST body, we retrieved the following information:
An attacker located upstream could replicate this attack on any Furbo device, allowing them to identify sensitive information such as their deviceId, accountId, Wi-Fi network SSID, and BSSID. These details could be used to locate the victim’s house by using something like wigle.net which maps SSIDs through war driving.
Following this win we wanted to see what other servers the device communicated with. We saved our PCAP and ran tshark on the PCAP. With this we were able to retrieve a list of all of the domains with which the Furbo device communicated during the boot up process.

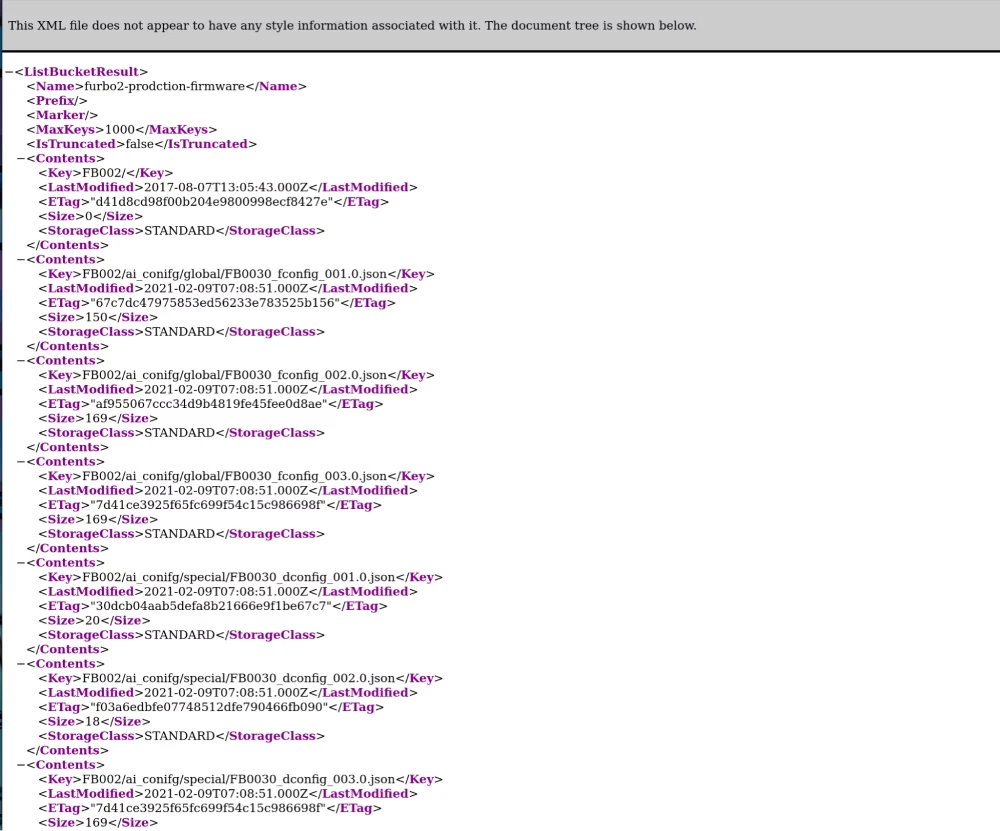
Of special interest to us and our analysis were the requests to the firmware S3 bucket. Navigating to the endpoint, we found that it provided us with a listing of its contents.
However, getting the correct firmware wasn’t going to be straightforward.
The files listed here used an internal Tomofun naming convention and as such we weren't sure which would be related to our devices and what was the latest version. So, to determine what was going on during this boot up process, identify the firmware version, and potentially gain shell access, we would need to tear the device apart and gain access via UART.
Device Tear Down
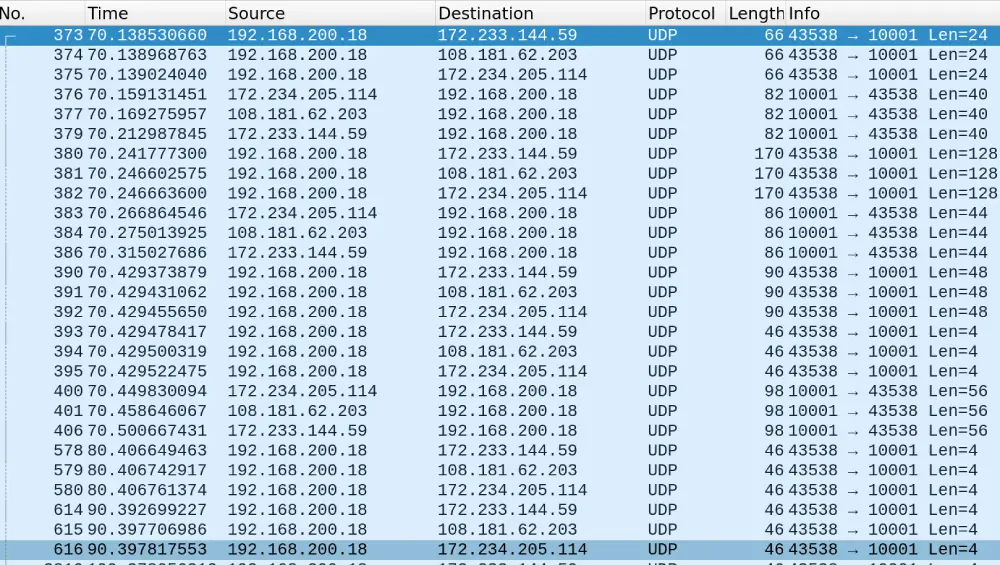
Anyone who has attempted to disassemble a modern IoT device has encountered some… challenges. Oftentimes these devices use very brittle plastic (which is highly prone to breaking), small screws, and little plastic clips which hold it all together. The Furbo 360 was no different and presented a number of obstacles.
Here we can see the device after the backing had been removed. There are several motors within view, one for tossing treats, and another for controlling the rotation of the device.
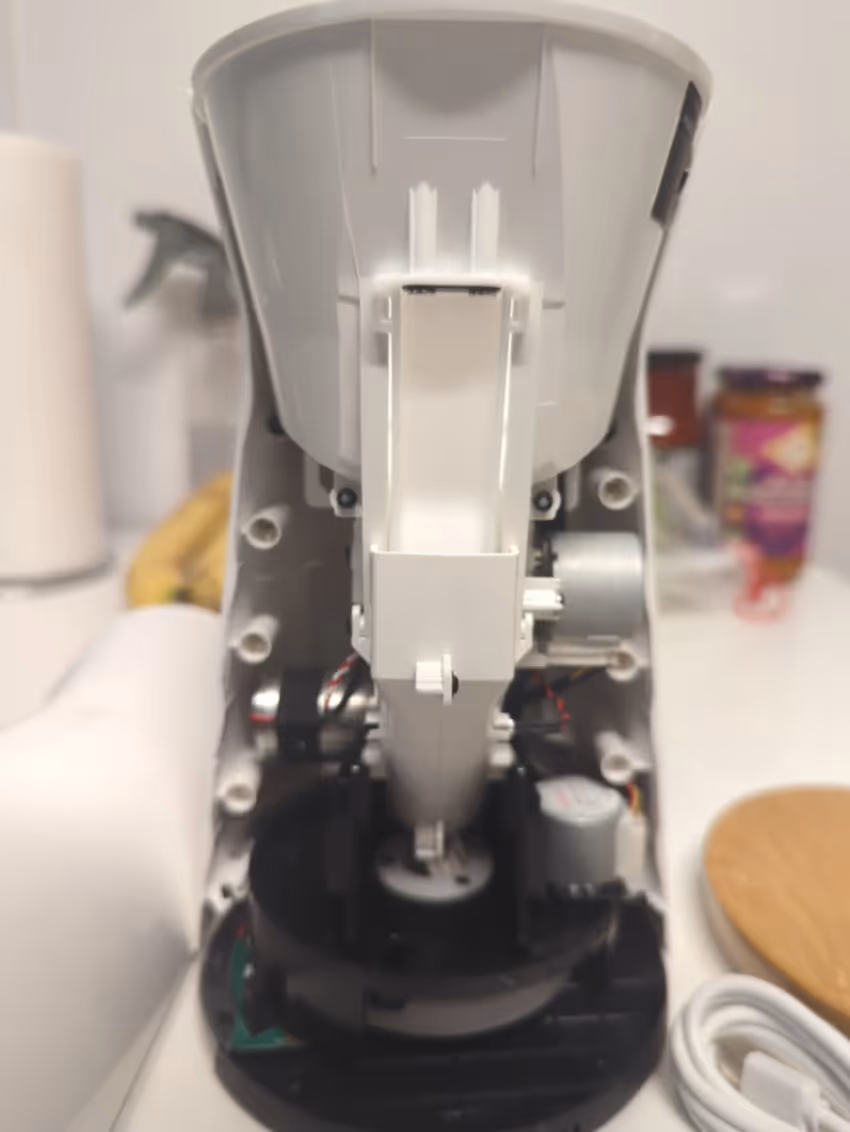
Unfortunately the screws put up quite a struggle and were seemingly impossible to undo, so we were left with one option: heat.

Obviously, don't try this at home (as we did) plastic fumes are not good for your health. Heating from the outside, the connector into which the screw went was melted and the front plate was removed. Here we can see the exposed internals, including the board which is covered by a metal shielding.
Thankfully, our rapid deconstruction technique did not harm the wires or PCB—however a Furbo was evidently harmed in the process of this research.

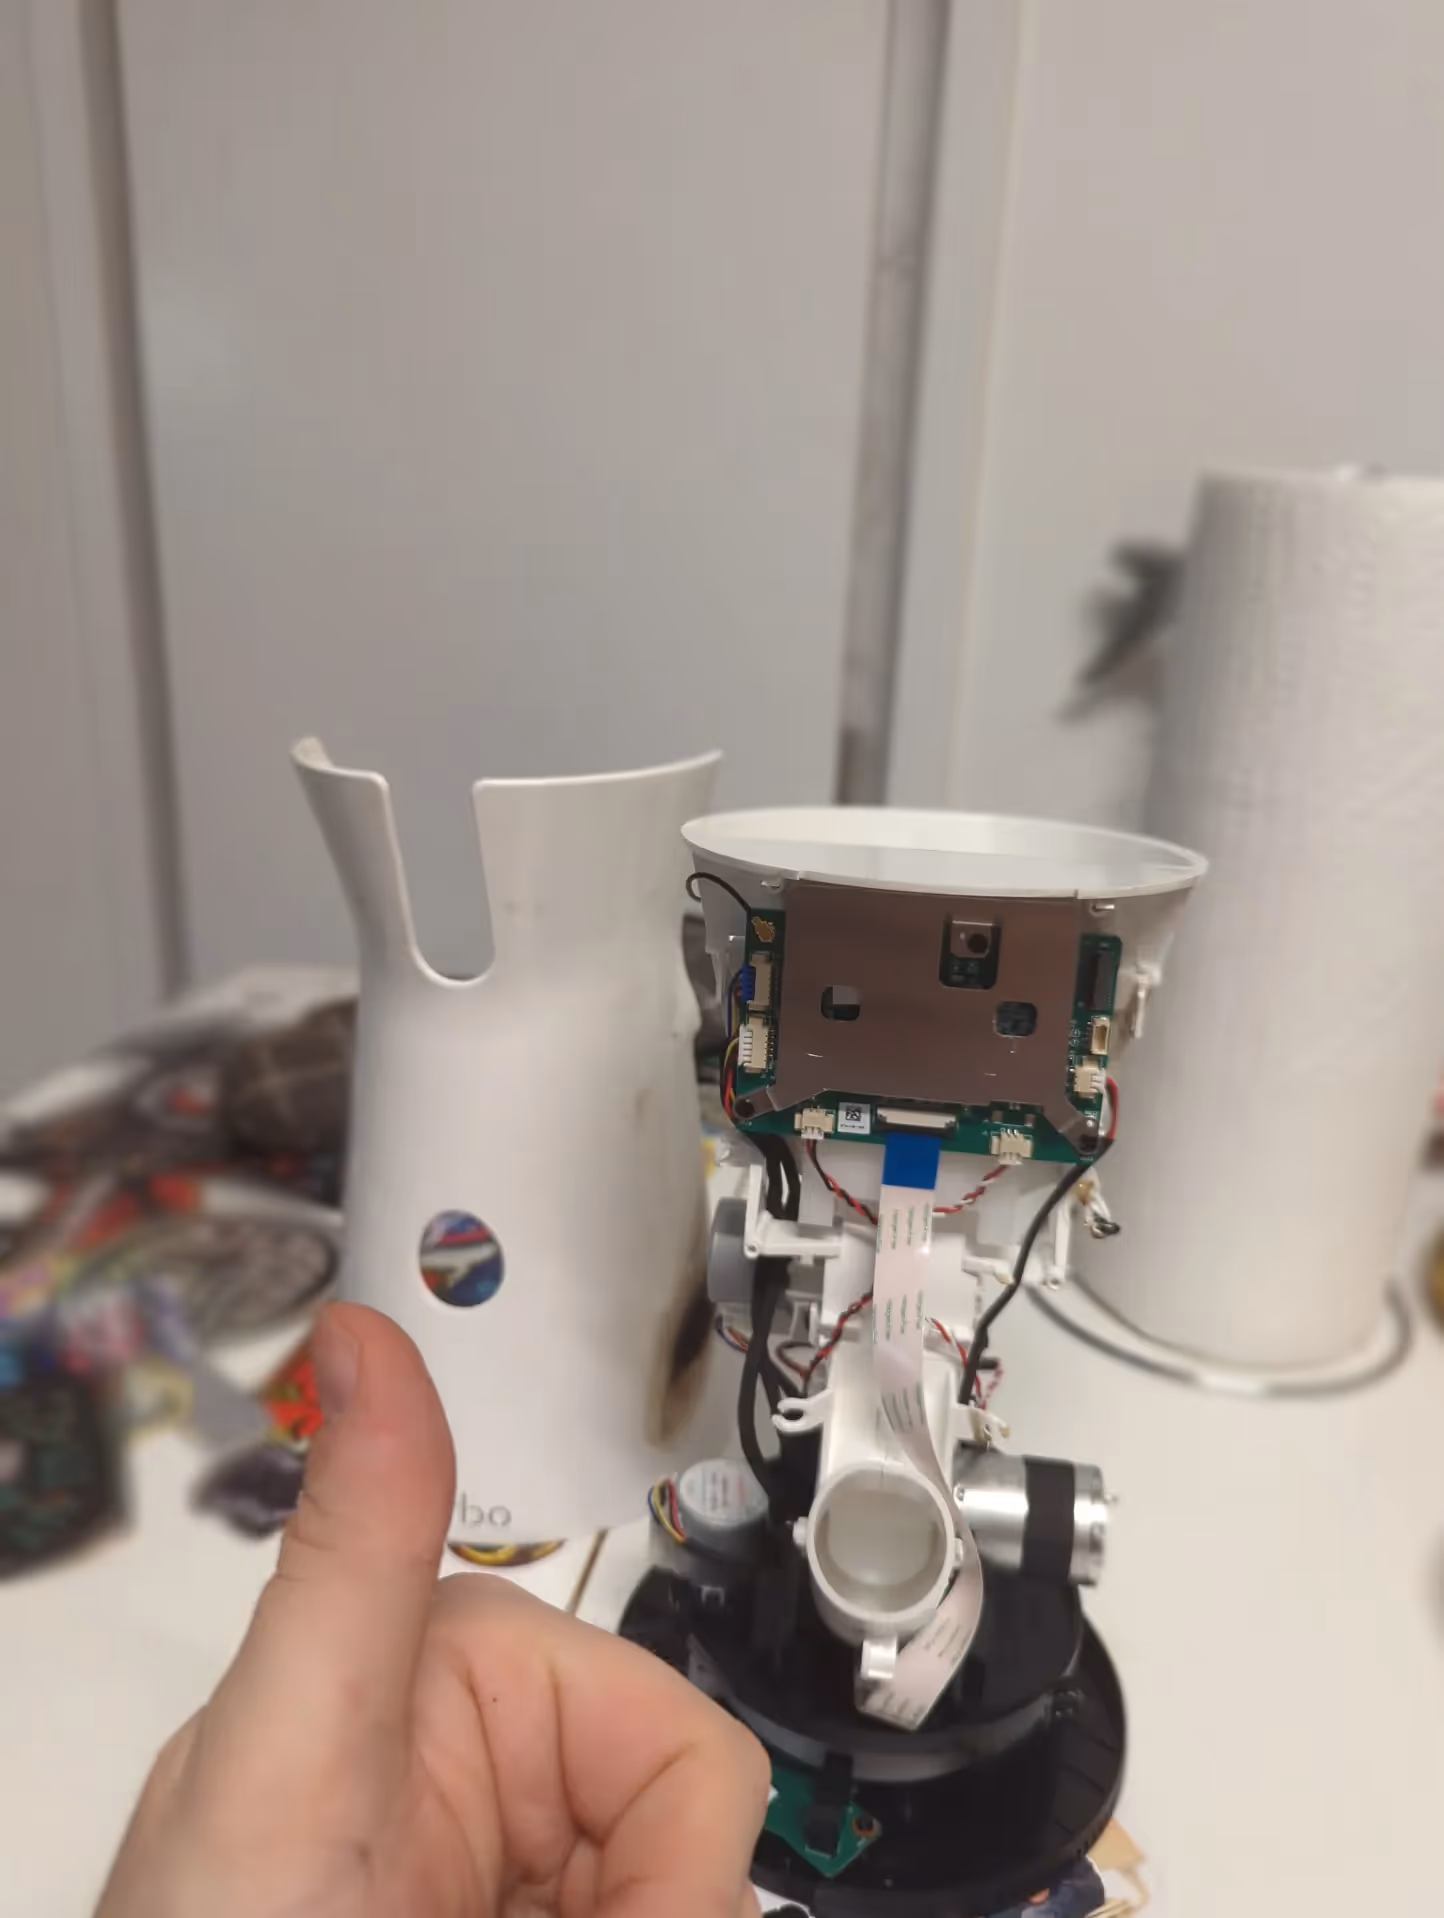
On the board, we spotted a 4-pin connector (see big red arrow) which by our best guess was UART. Taking a Digital Multi-Meter and probing each pin confirmed our suspicion. It was quite a strange UART connector and not something we had come across before.
We were able to get a connection through these small clip-on connectors, however they were far from reliable, oftentimes falling off while moving things around and proved to be a real pain. We ended up ordering several STEMMA QT / Qwiic JST SH 4-pin to Premium Male Header Cables which allowed us to more easily interface with the device.
UART
Once having received our connectors we got things going with picocom and were able to get our first glimpse into the device's UART logs.
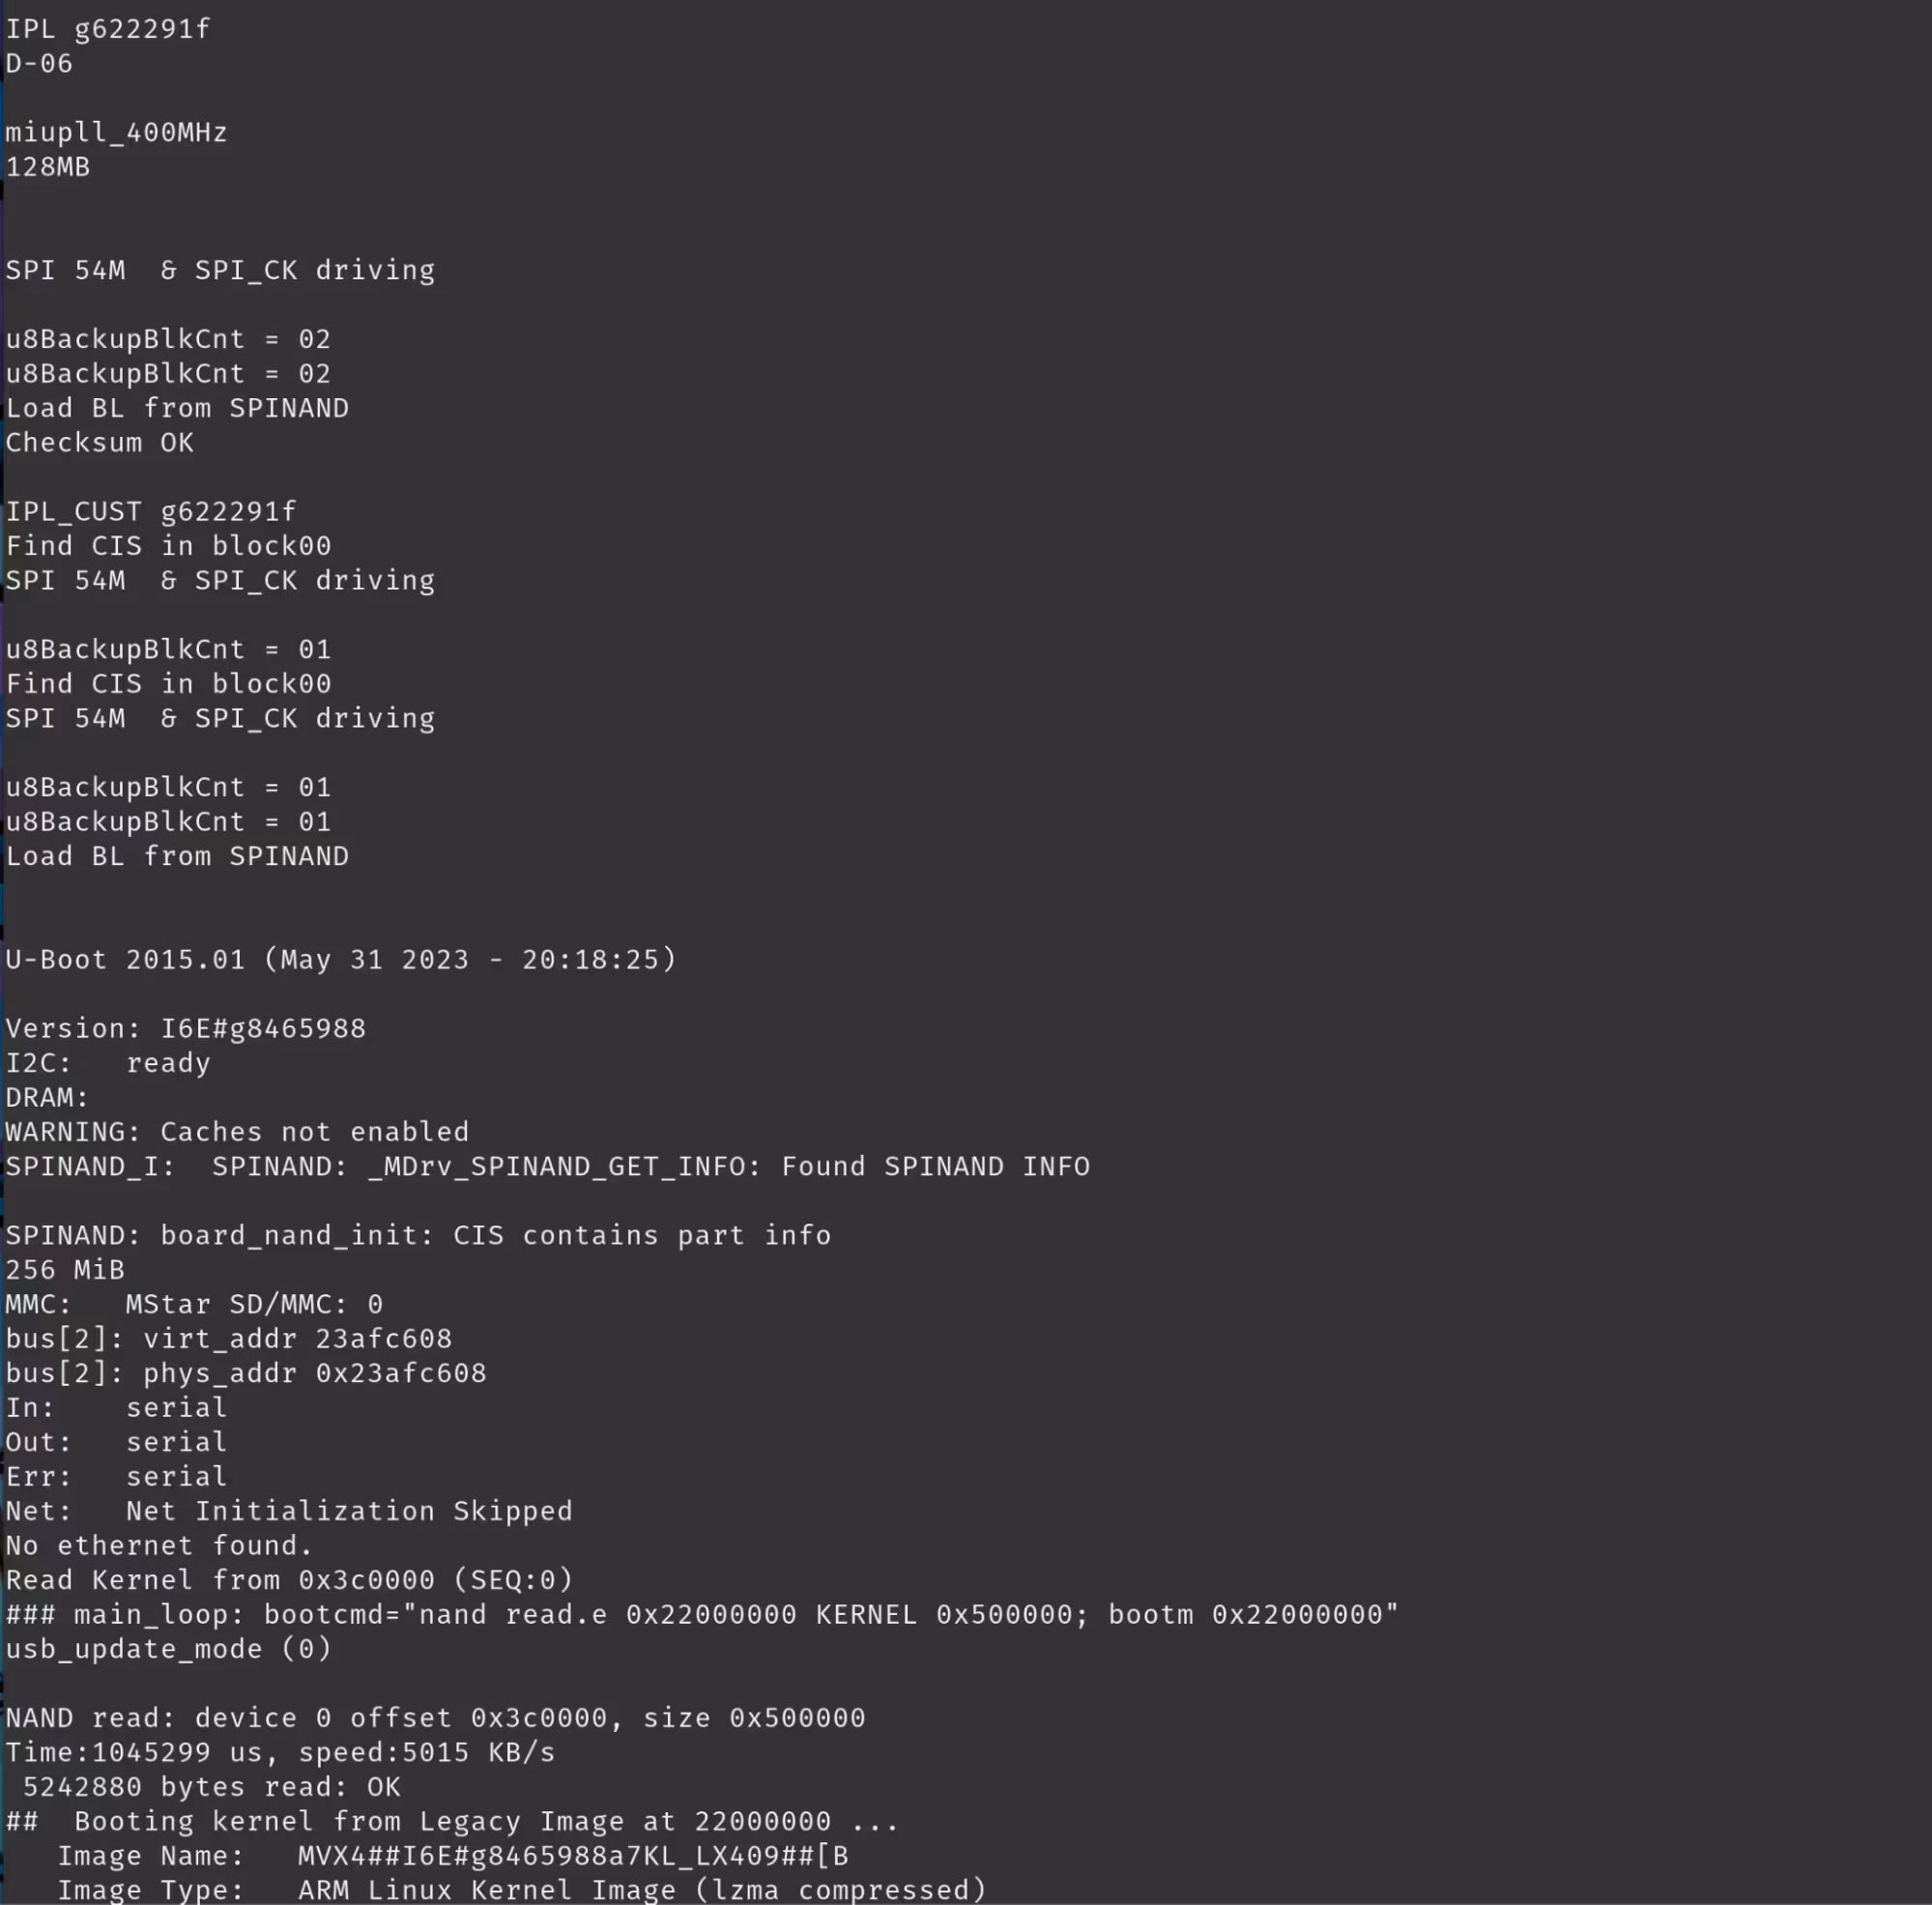
Monitoring these logs we were able to determine the firmware version, where it is downloaded from, and a number of other key details.
We also were able to determine the P2P communication protocol in use: TUTK's Kalay Platform. We will return to this later. Unfortunately for us the UART interface was password protected. This was a huge improvement in security when compared to what the researchers at SomersetRecon experienced. They were fortunate enough to be able to drop into a root shell through a U-Boot escape. We would have to try to get the password or pull the firmware through a chip off extraction.
Firmware Retrieval
While finding the URL for the exact firmware version in use was a win, we were quickly presented with another challenge. This firmware was encrypted and running binwalk on the file returned nothing of value. After trying countless ways to decrypt it with the SecretKey in the previous screenshot, we realized that it was not working because we had not hex-encoded the SecretKey.
We had to first modify the firmware file with dd, skipping the first 64 blocks of padding. Then, passing it to openssl we decrypted it using aes-256-ecb.
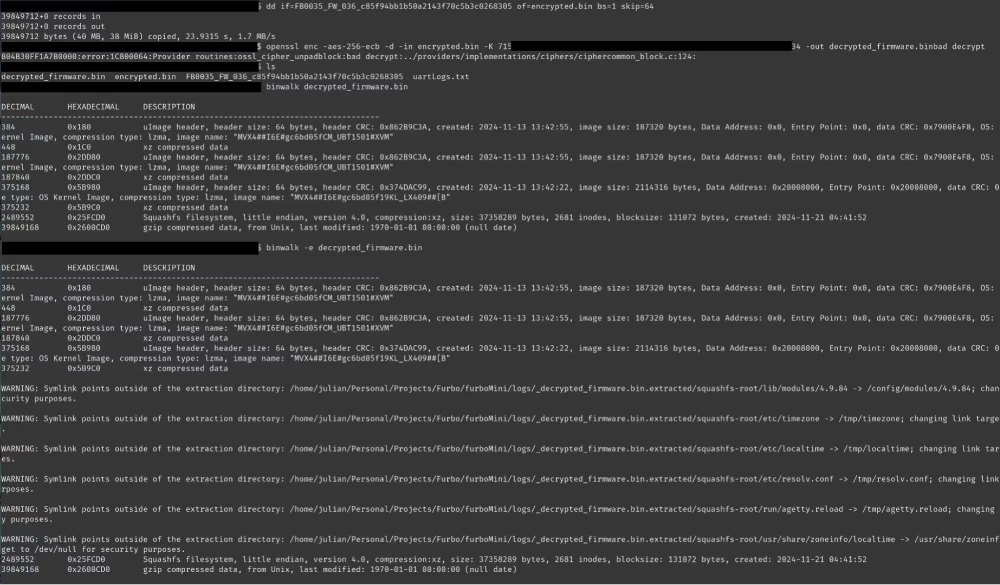
And with that, we had access to the squashfs root!
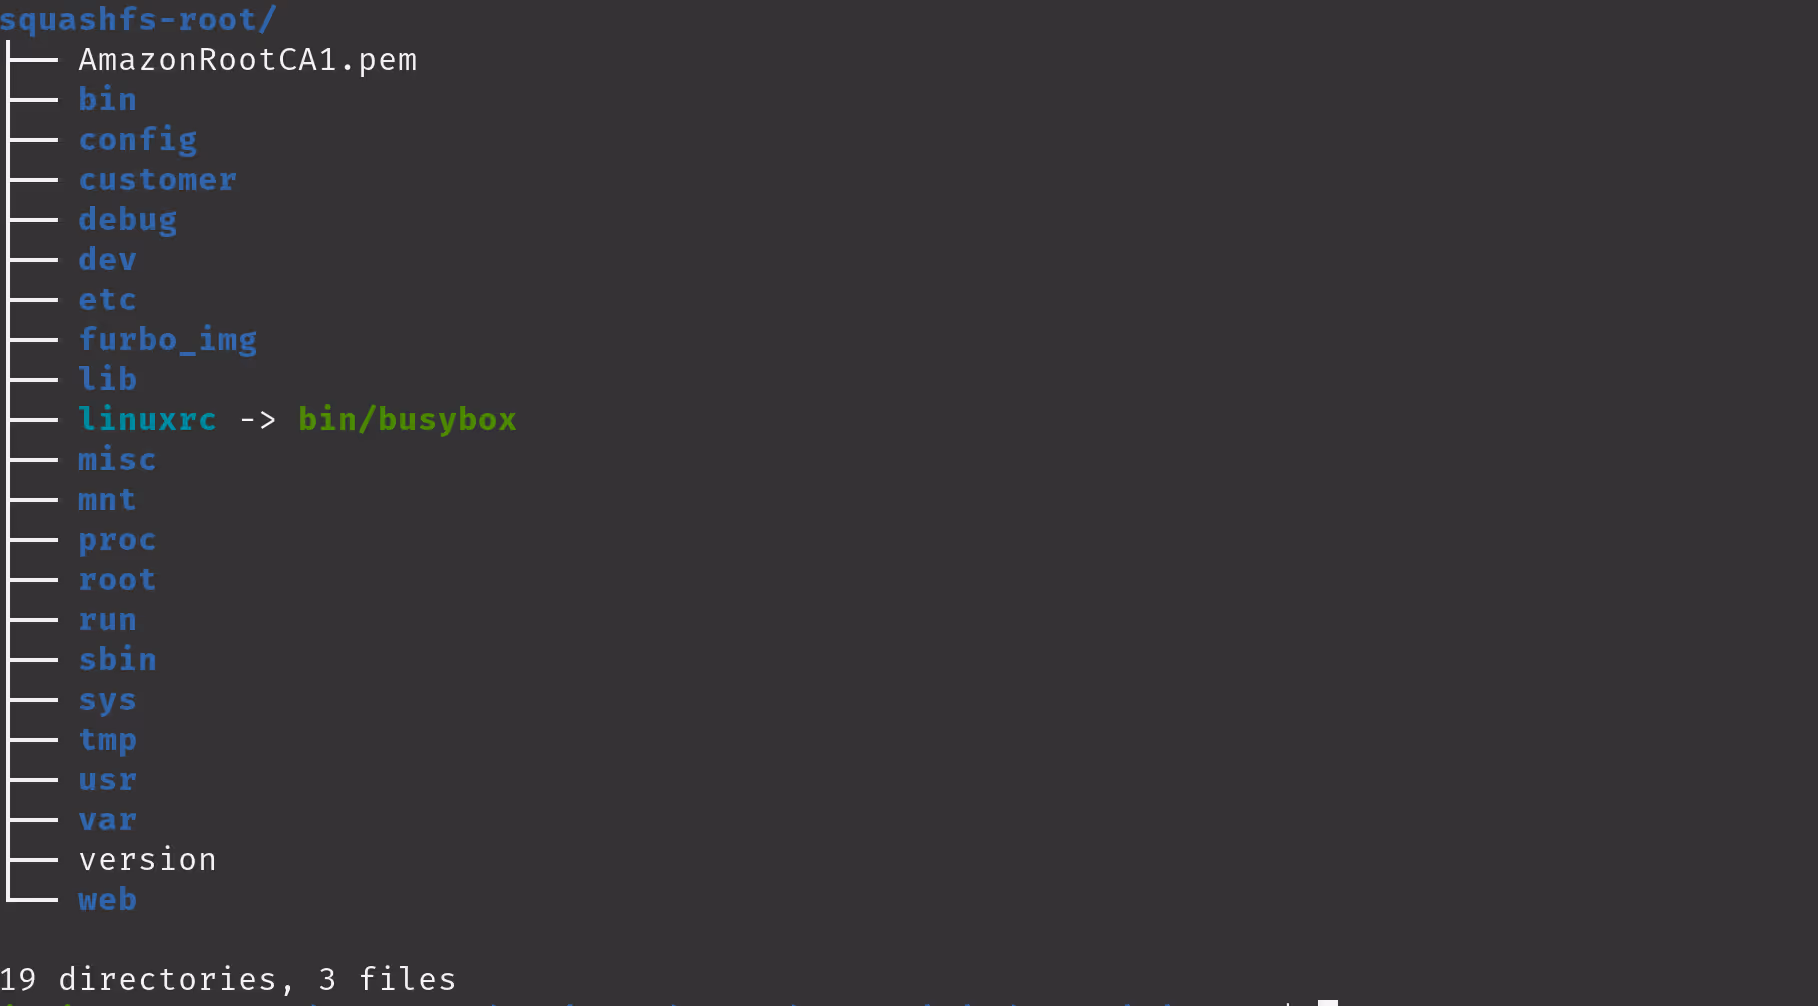
From here, we went about the process of identifying any custom applications, files, scripts, and grabbing the password hash for the root user.
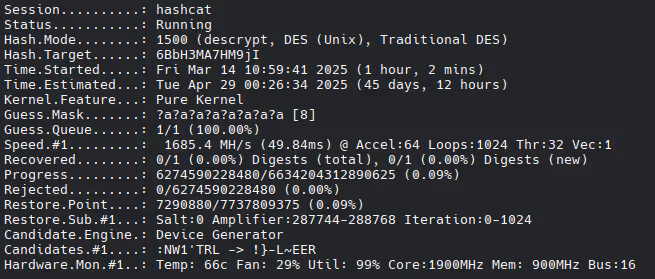
The password we found was DES encrypted, a bit strange for a modern Linux system, it is far more typical in older distributions. This would make our cracking of the password challenging, though possible.
Now for a little bit of history. First published in 1975, Data Encryption Standard (DES) was a great encryption protocol at the time and became “the most widely used method of symmetric data encryption ever created”, however since 1975 it was known that it is susceptible to brute force attacks but they were infeasible at the time.
The DESCHALL project was the first to—publicly—succeed in brute forcing a DES hash. As computers became more powerful, breaking DES went from impossible to reality. Matt Curtin detailed his involvement in the 2005 book, Brute Force: Cracking the Data Encryption Standard, the project was completed by thousands of volunteers combining their computing power to reveal the encrypted string to be: "Strong cryptography makes the world a safer place."
Fortunately for us, we would not need thousands of volunteers, rather one kind friend willing to sacrifice his GPU for a couple weeks. The initial time estimate was roughly 45 days, with a RX 6900 XT.
Fortunately for us, these are simply estimates and in the end we were able to brute force the encrypted password in (JUST!) 11 days (and 22 hours)!
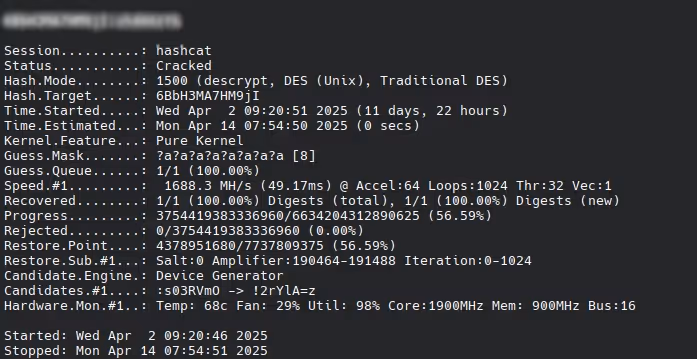
With this hash cracked, we would now be able to gain shell access with the root account on any Furbo device over UART.
Conclusion
That ends the first part of our six-part blog series. Having successfully obtained access over UART we could now move into some more interesting attacks! In subsequent posts we will review the application binaries in Ghidra, begin testing the mobile application, and more! The first step in any serious IoT security assessment is the same as what's described here. Get the hardware, understand the attack surface, and start pulling on threads. If you want an independent team to do this for your product before it ships, see how Software Secured structures IoT penetration testing engagements.
Ready to get in touch? Get started by booking a consultation now.
About the author

Julian B
Penetration Tester
Julian is an intermediate penetration tester with nearly five years of experience working in cybersecurity, dedicated to penetration testing, open-source intelligence gathering, and moving the needle forward for organizations across Canada. He regularly engages with the community through presentations at conferences, on a range of topics including vulnerability research and OSINT investigations. This is work is underlined by several CVEs which have been attributed to his research on open-source applications.


.avif)